Cave Casualties Wiki

LAST UPDATED

Cave Casualties is a Roblox cave exploration and survival game where you descend into dangerous caves, gather supplies and manage injuries before extracting with your loot. Find beginner and co-op guides, compare loadouts and supplies, and learn about healing, extraction, biomes, creatures and skill upgrades.

GenreAdventure
Visits984K+
Favorites21K+
CreatorBleedout Interactive
Released2026-10-28
Updated2026-11-16
Cave Casualties official artwork GAMEPLAY

Beginner Route

3 STEPSFull guide →
1

Complete Orientation and pack supplies

Practice movement and medical treatment, then use PACK FOR THE TRIP to select up to three items from your stash. Medkit, Lasso and Machete cover treatment, rope movement and defense.

2

Start a lift and descend

Create or join an expedition, leave the Survey Capsule and search containers along your route. When bleeding starts, inspect the affected body part and secure a dressing.

3

Find a Rescue Capsule and extract

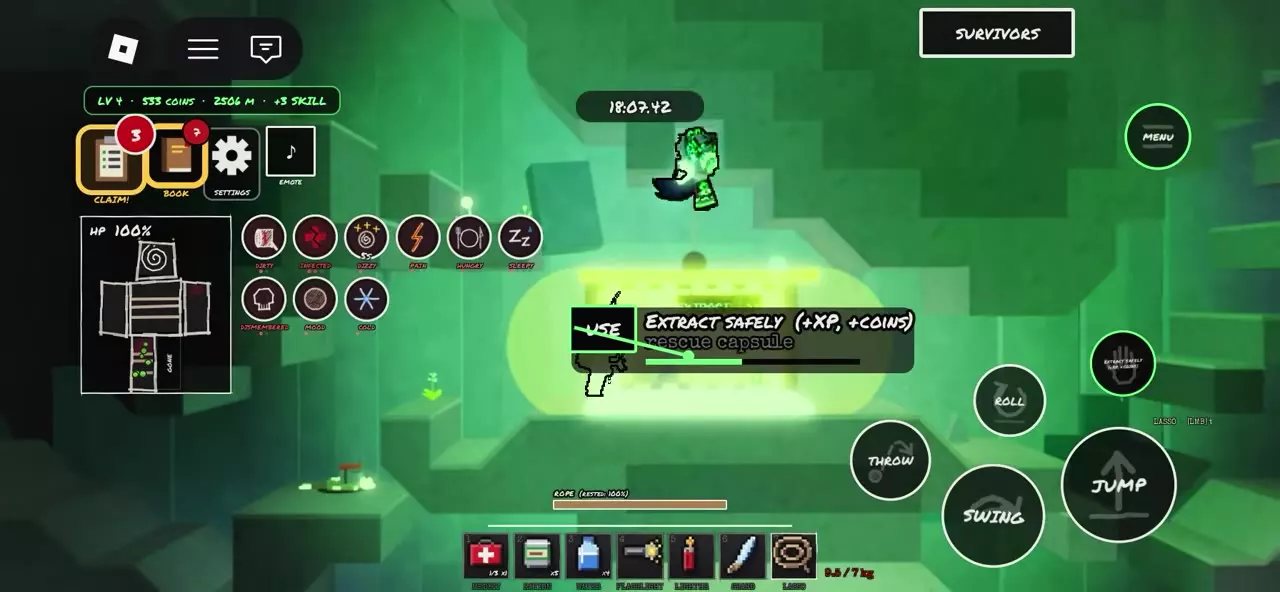
Follow the map’s Extraction marker, look for the green light and EXTRACT sign, and complete EXTRACT SAFELY to leave alive with your carried loot and earn XP and Coins.

Early Descent Progression

Layers mark downward progress; biomes describe local environments and can repeat during a descent. The arrival XP values in this comparison are expedition examples.

After discovering a biome or species, open BOOK → BIOMES or SPECIES and collect its first-discovery XP. Check your skill points after leveling up. Use the biome directory to prepare for local hazards and the leveling guide to combine exploration with reward claims.

NameLayerArrival XP example
The Throat
1
30 XP (Expedition arrival example)
Salt Veins
2
60 XP (Expedition arrival example)
The Den
3
90 XP (Expedition arrival example)

No codes are currently listed.

Wiki Reference

Quick Data

BiomesFull table →
Summary figures only. Bars compare rows in this table.
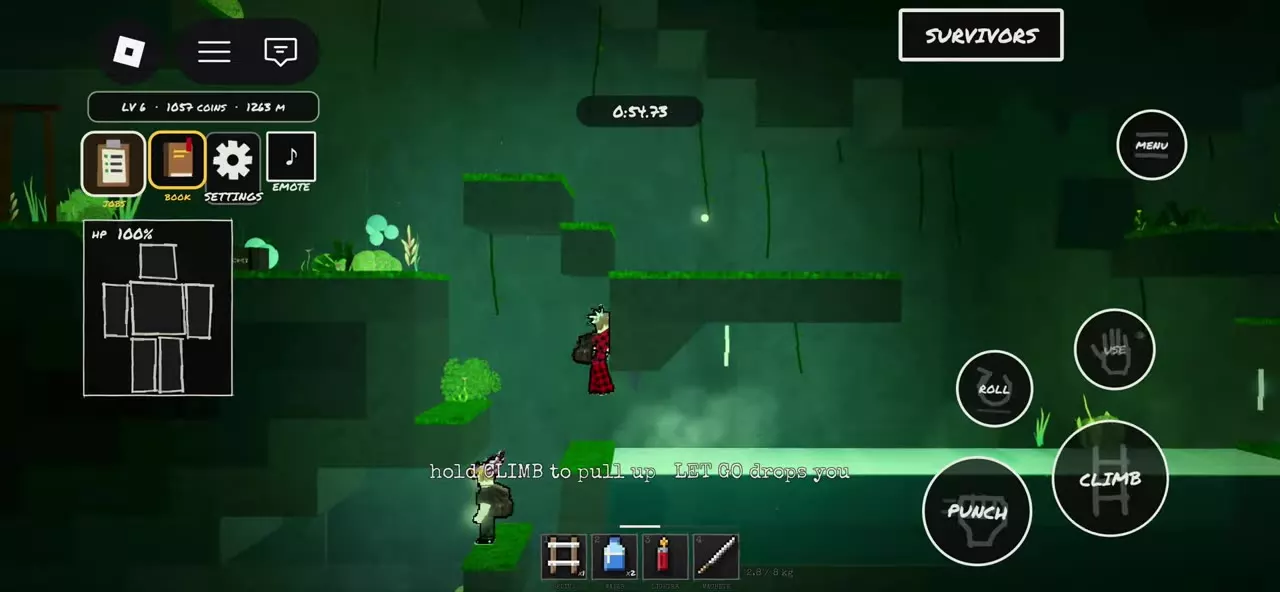
A character hanging from a ledge with the CLIMB pull-up prompt.

Cave Casualties Controls and Movement

Jump toward a reachable ledge while holding toward it to catch the edge. Once hanging, hold Space on PC or CLIMB on mobile until you pull up; S or LET GO releases the ledge.

Between two close walls, hold Space on PC or JUMP on mobile to ascend. For a landing roll, press Q on PC or ROLL on mobile just before touchdown to reduce fall damage. The PC walking dodge uses C, a separate movement action.
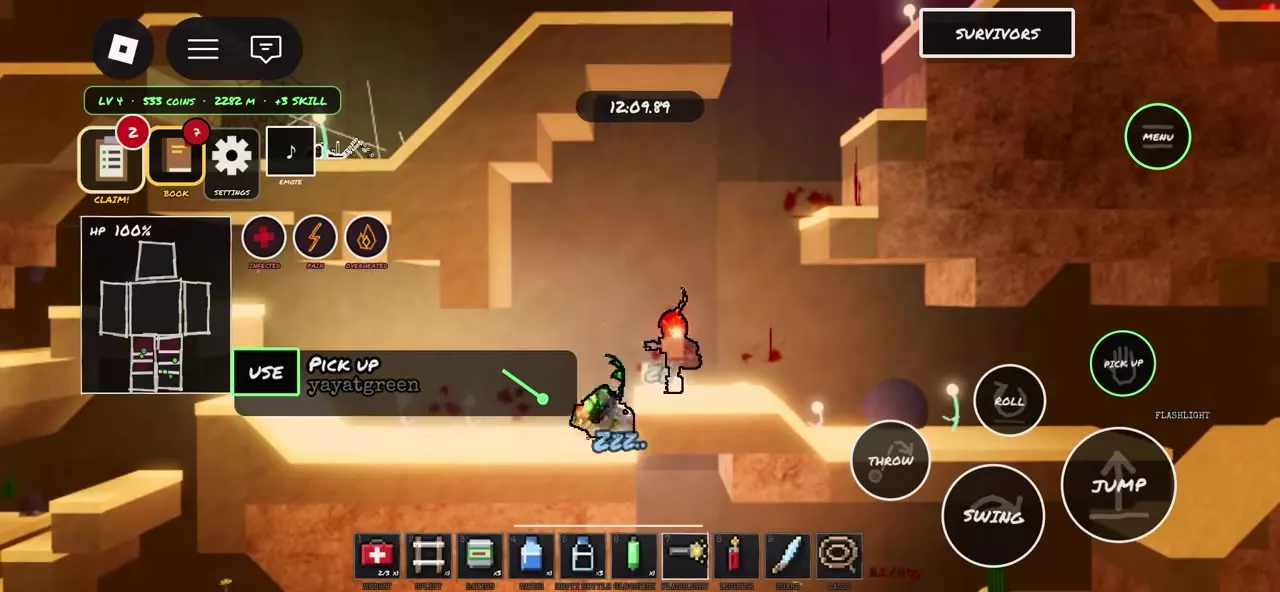
PICK UP interaction beside a sleeping teammate.

Cave Casualties Co-op: Lifts, Healing and Carrying Friends

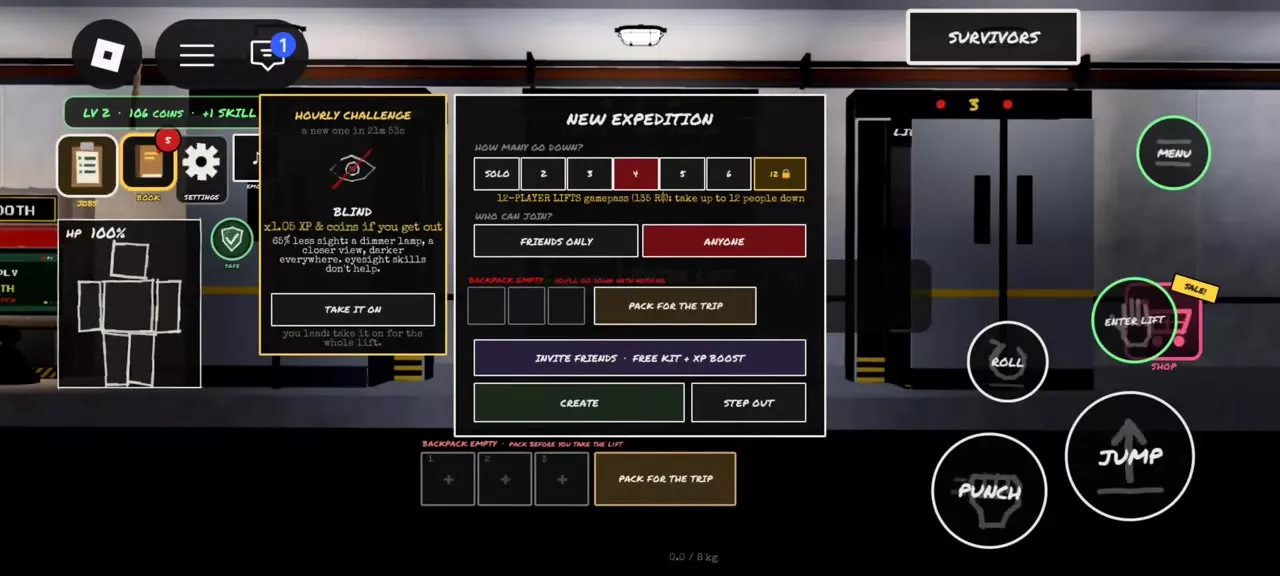
Use ENTER LIFT, select your party size and choose Friends Only or Anyone before creating the expedition. Standard lifts support up to six players; twelve requires 12-PLAYER LIFTS. A lift can depart below its selected capacity.

Inviting a new player gives both players a gear set containing a Lasso, Machete and Medkit. Descending together grants +20% XP and Coins; each friend adds a further 10% XP, up to +60% XP.

On PC, right-click a nearby teammate to inspect and treat their injuries. To move a sleeping player, approach until PICK UP appears. Carrying them adds a heavy load; use PUT DOWN, E or right-click to set them down.

Inventory & Loadouts

All pages →↑ Browse
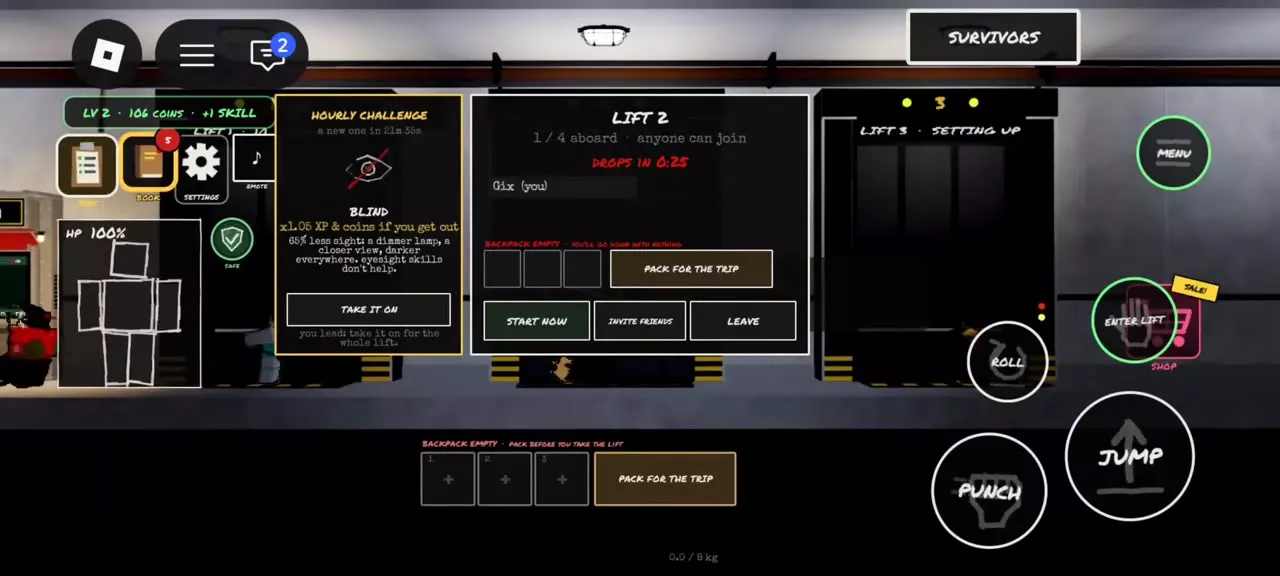
Lift waiting screen with three backpack slots and the Pack for the Trip button.

Cave Casualties Starting Loadouts for Different Trips

Keep a Medkit and Lasso for treatment supplies and rope movement, then choose the third item around your route.

Trip priority Third item Supply Booth total
General exploration Machete 578 Coins
Digging Pickaxe 451 Coins
Lighting Flashlight 451 Coins

These budgets buy one of each item, including the Medkit and Lasso. Subtract supplies you already own.

The Medkit dispenses Clean Bandages or Splints. Replacing the Machete with a Pickaxe avoids punching rock with your fists; choosing a Flashlight gives you a switchable white beam and a teeth-held option. Both swaps give up the starting Machete’s combat role.

Purchased items enter your stash. Select them through PACK FOR THE TRIP before descending—the three-item limit applies to departure packing, not your total underground inventory.

Tools Supply Booth priceSupply Dealer price
Glowstick 17 coins—
Lighter 60 coins33 coins
Pickaxe 128 coins71 coins
Flashlight 128 coins71 coins
Lasso 221 coins122 coins
Medical Supplies Supply Booth priceSupply Dealer priceDaily Bonus day
Bandage 21 coins12 coins2 day
Painkillers 34 coins——
Splint 51 coins—5 day
Antibiotics 77 coins43 coins6 day
Medkit 102 coins57 coins4 day

Healing & Injuries

All pages →↑ Browse
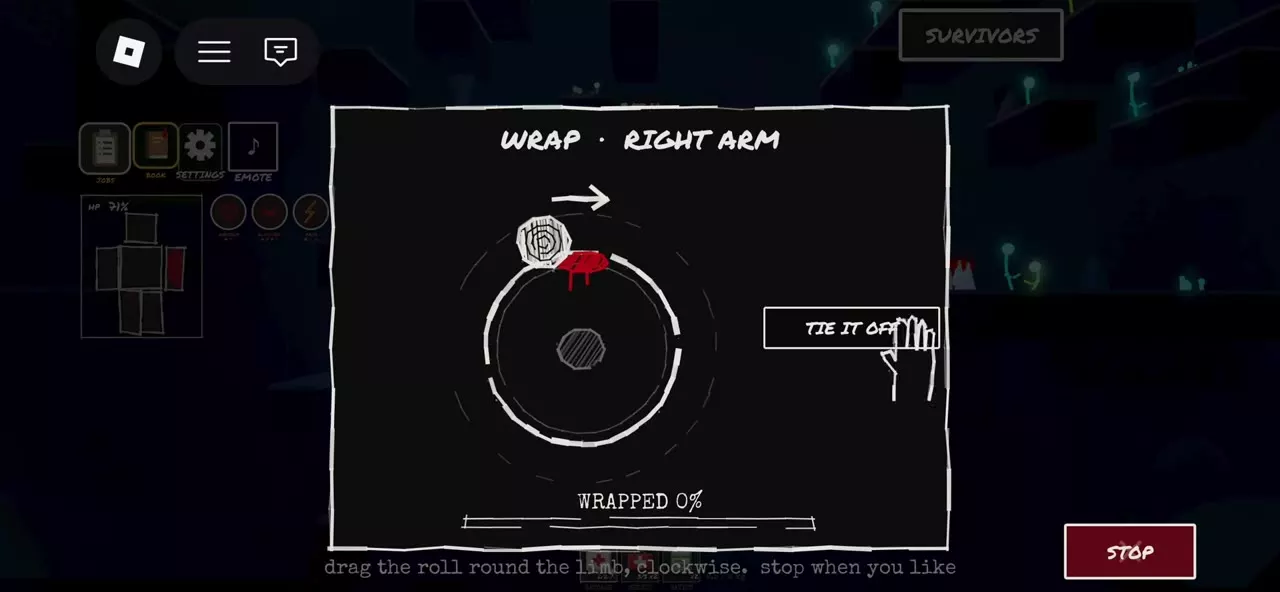
Right-arm wrapping interface with a clockwise arrow, progress meter and TIE IT OFF button.

Cave Casualties Healing and Injury Treatment

Press H or open MENU → BODY, then select the injured part. Overall HP and body-part health are separate, and several conditions can affect the same limb.

  • Embedded fragments: grip, rotate and pull each fragment outward slowly. Removing them does not stop the wound’s bleeding.
  • Bleeding: choose BANDAGE, drag the roll clockwise and finish with TIE IT OFF. Recovery takes effect gradually after securing the dressing.
  • Dirty coverage: prepare a clean replacement, remove the old dressing through TAKE OFF, then inspect and rewrap the wound.

Treat infection separately: Antibiotics slow its progression, while Antiseptic with a clean dressing suppresses it. A bandaged limb can remain infected.

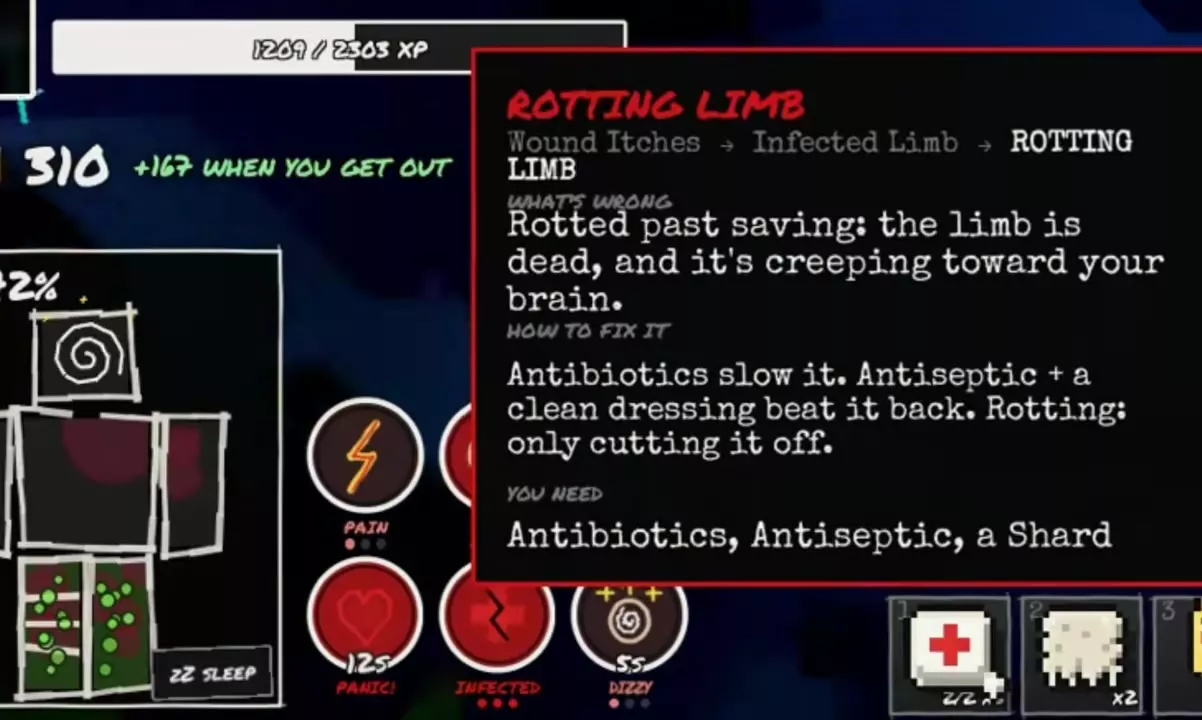
Rotting Limb tooltip explaining dead tissue and infection treatment.

Cave Casualties Amputation and Stump Care

ROTTING — IT HAS TO COME OFF identifies dead tissue that treatment cannot restore. The CUT IT OFF button also appears on limbs without rot, so inspect the selected part before confirming. The original limb cannot be reattached.

Have a Shard or Machete and a clean dressing ready before cutting. After removal, immediately select the stump in BODY, bandage it clockwise and use TIE IT OFF. Keep the stump clean; sleeping does not stop its untreated bleeding.

Losing a leg changes movement. Prepare a Lasso for rope assistance, or fit an available Wooden Prosthetic through BODY → PROSTHETIC after dressing the stump.

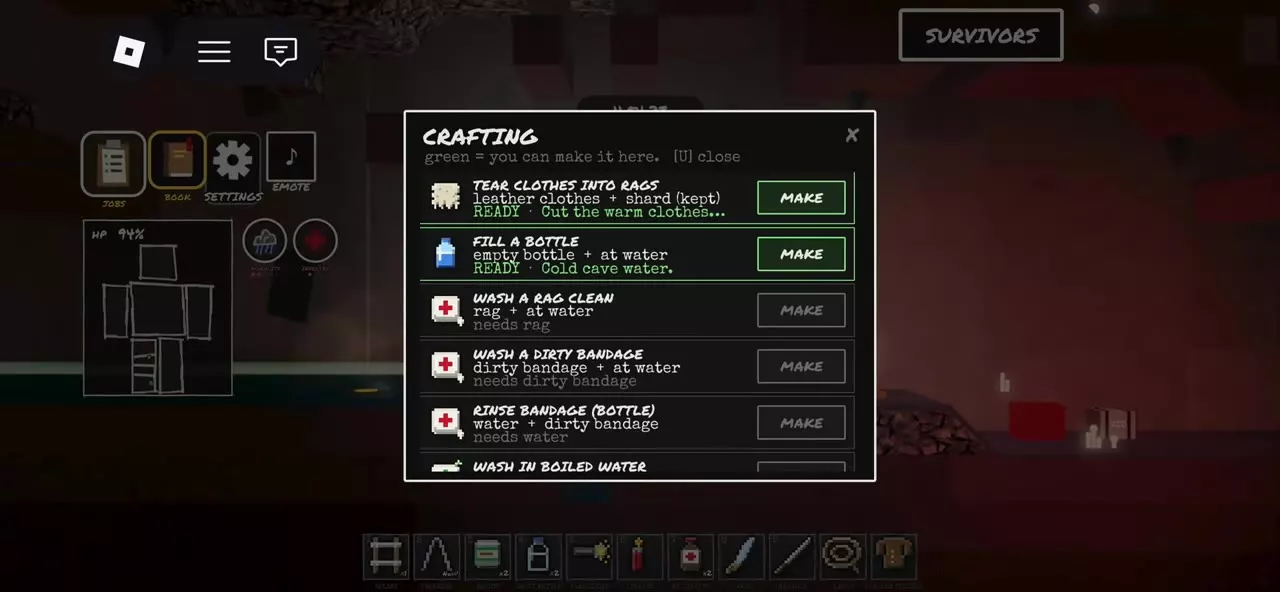
FILL A BOTTLE recipe marked READY with its MAKE button.

How to Find Food, Drink and Refill Water in Cave Casualties

Finishing bottled Water leaves an Empty Bottle. Keep it, stand at a cold, clean water source and open MENU → CRAFT → FILL A BOTTLE. Select MAKE when the recipe is green and READY to carry water onward.

Refill before extended running or climbing: Dry mouth slows breath recovery by 10% and increases breath consumption by 10%. Drinking by hand at a suitable pool relieves less thirst than bottled Water.

Do not drink The Toxic Depths’ green water. Carry drinking supplies into The Magma Depths, where lava replaces the local water supply.

Food & Water Supply Booth priceSupply Dealer price
Water 13 coins8 coins
Boiled Water 21 coins12 coins
Ration 26 coins15 coins
Cooked Spider Meat 30 coins—
Hot Ration 38 coins—
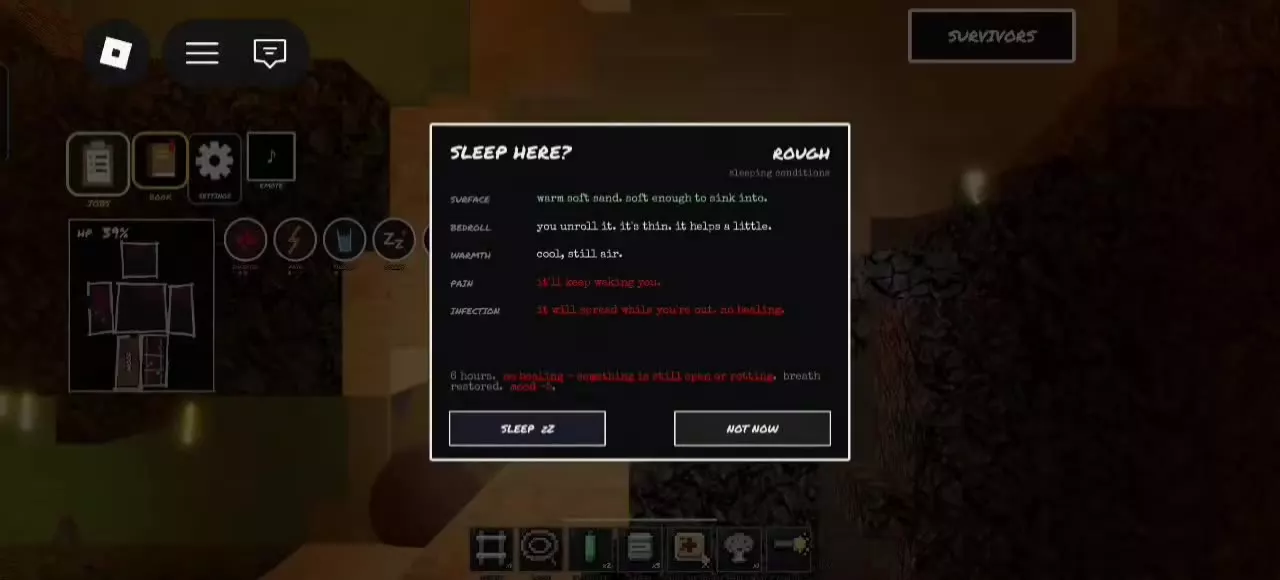
Sleep preview warning of pain, infection and blocked healing.

Cave Casualties Sleep, Rest and Stamina

When Out of Breath prevents running, stop exerting yourself and use MENU → SLEEP to rest. Before confirming sleep, read SLEEP HERE? for the current surface, Bedroll, warmth, duration and projected HP, breath and mood changes. Soft beds, moss and grass provide more comfortable surfaces than bare rock; a nearby fire supplies warmth.

Open or rotting wounds block sleep healing. Bleeding and infection continue during sleep, and pain repeatedly wakes you. Treat those problems in BODY, then reopen the preview to see the updated recovery.

Breath recovery remains possible when HP healing is blocked. Press JUMP during sleep to wake early.

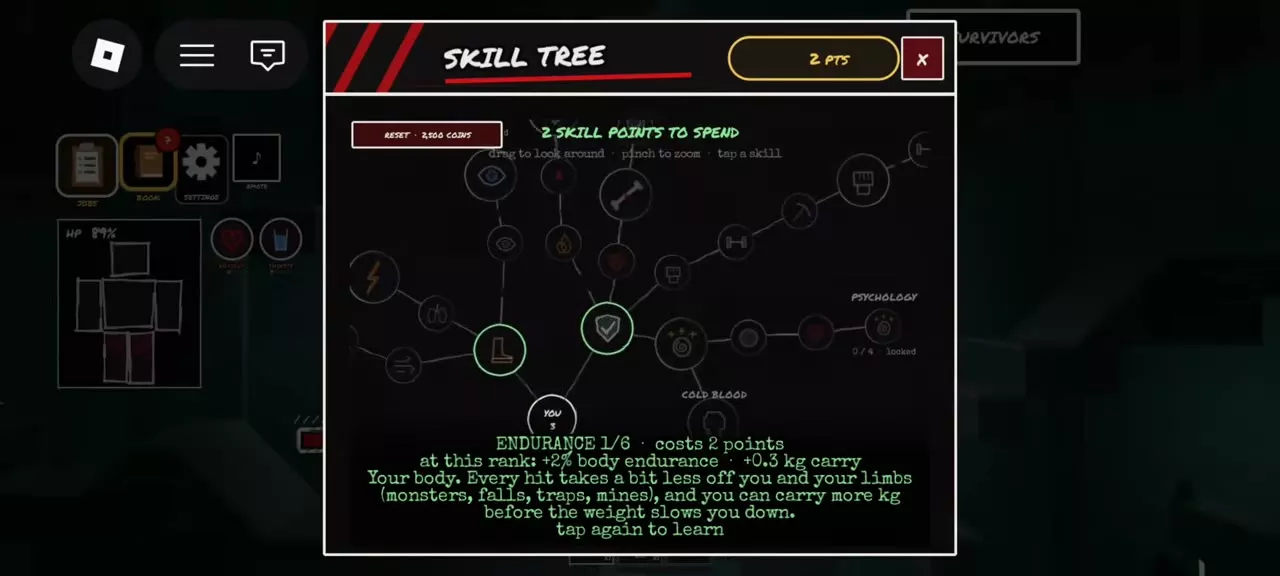
Skill Tree with Endurance selected, its rank effects, a two-point cost and the tap-again learning prompt.

Cave Casualties Skill Tree and Upgrade Choices

Main difficulty Branch to prioritize
Long climbs, swims, hangs or sprinting Movement: stamina, recovery, speed and jumping
Incoming hits or heavy supplies Endurance: damage reduction and carrying weight
Fighting or repeated digging Strength: attacks and digging efficiency

Open MENU → SKILLS and check your PTS. Select an available node once to inspect its effects and cost, then select it again to learn it if you have enough points. Unspent points do not unlock a locked node.

For other problems, Psychology addresses panic attacks, while Tolerance slows environmental deterioration and infection spread.

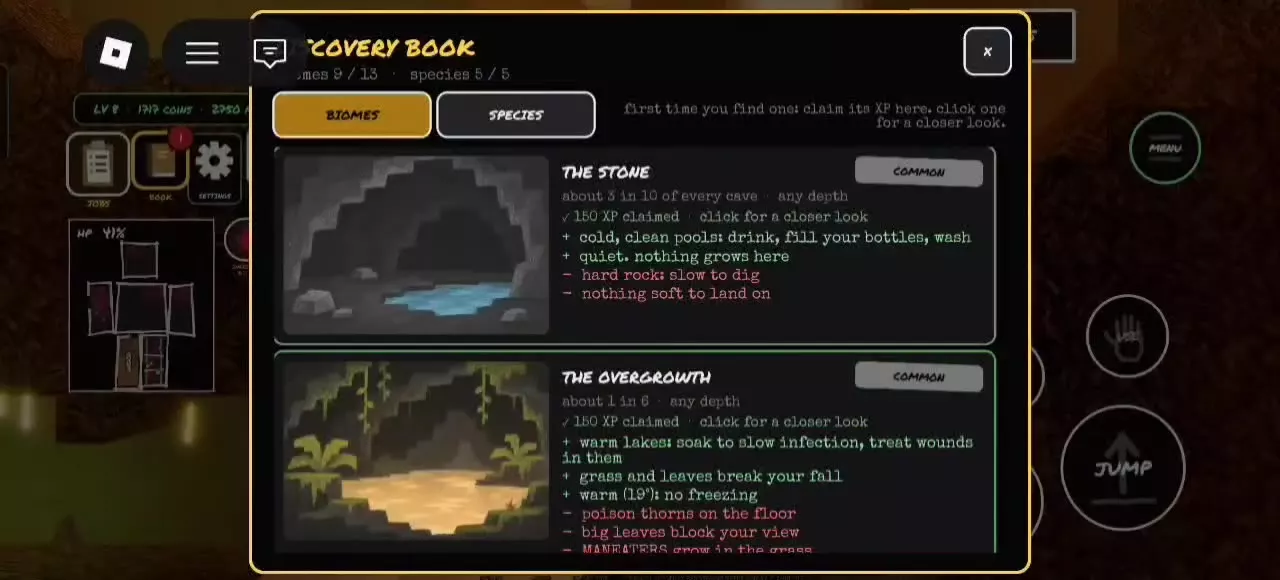
Discovery Book showing the Biomes and Species tabs and claimed biome XP

Cave Casualties XP and Discovery Rewards Guide

Check active Contracts before descending, then search containers and find new biomes or species along the same route. These actions provide separate XP opportunities without requiring a dedicated combat trip.

First discoveries need a claim: open BOOK → BIOMES or SPECIES, find the discovered entry and select CLAIM XP. The Overgrowth awards 150 XP for its first discovery; The Frost awards 600 XP. Discovery rewards are separate from creature-kill rewards, so collect them even when you avoid a fight.

Return to JOBS for completed Contract claims, then check the Skill Tree for points earned through leveling.

Skills & Leveling Listed point costMaximum rank
Endurance 2 skill points6 ranks
Movement 2 skill points6 ranks
Psychology 2 skill points4 ranks
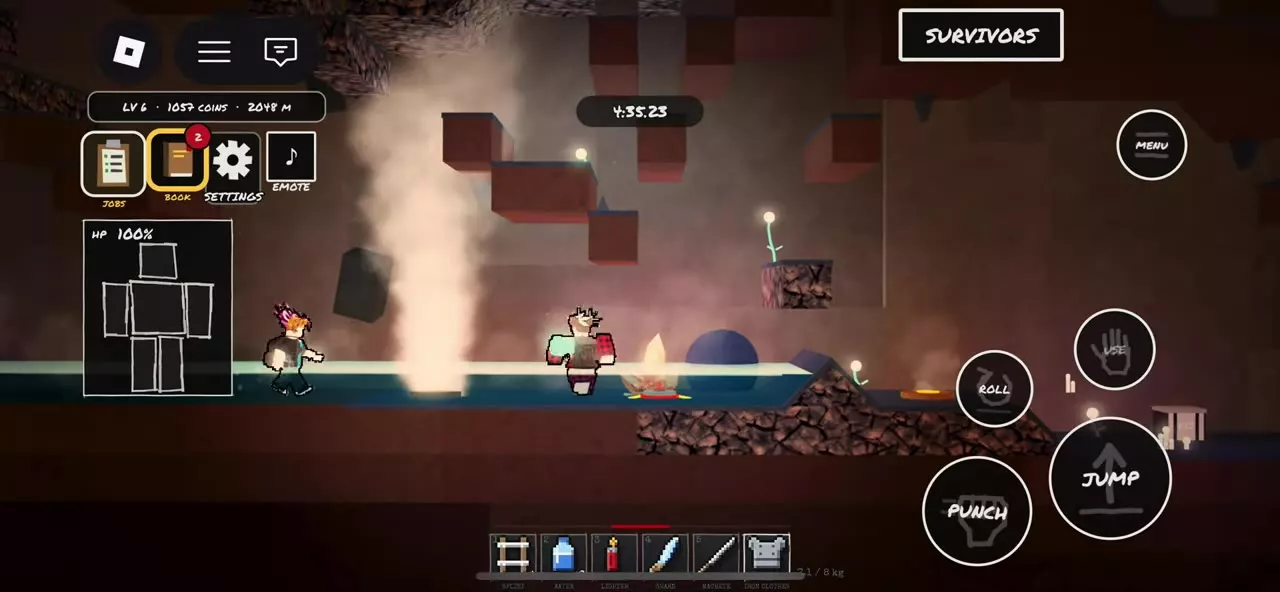
A steam vent erupts beside a pool in The Geysers.

Cave Casualties Biomes, Depths and Layers

Prepare for each biome’s conditions rather than treating biome names as a fixed layer sequence:

  • The Geysers — from approximately 1,100 m: warm springs support soaking and wound care. Boiling pools burn you, and steam vents throw you upward; leave boiling water and avoid vent outlets.
  • The Frost — from approximately 1,500 m: easily dug snow provides soft landings, but the temperature is approximately −24°C. Prioritize warmth; its cold water does not warm you.
  • The Flooded Caves — from approximately 1,800 m: warm, drinkable water nearly reaches the ceiling. Locate breathing spaces and an upward exit before committing to a submerged passage.
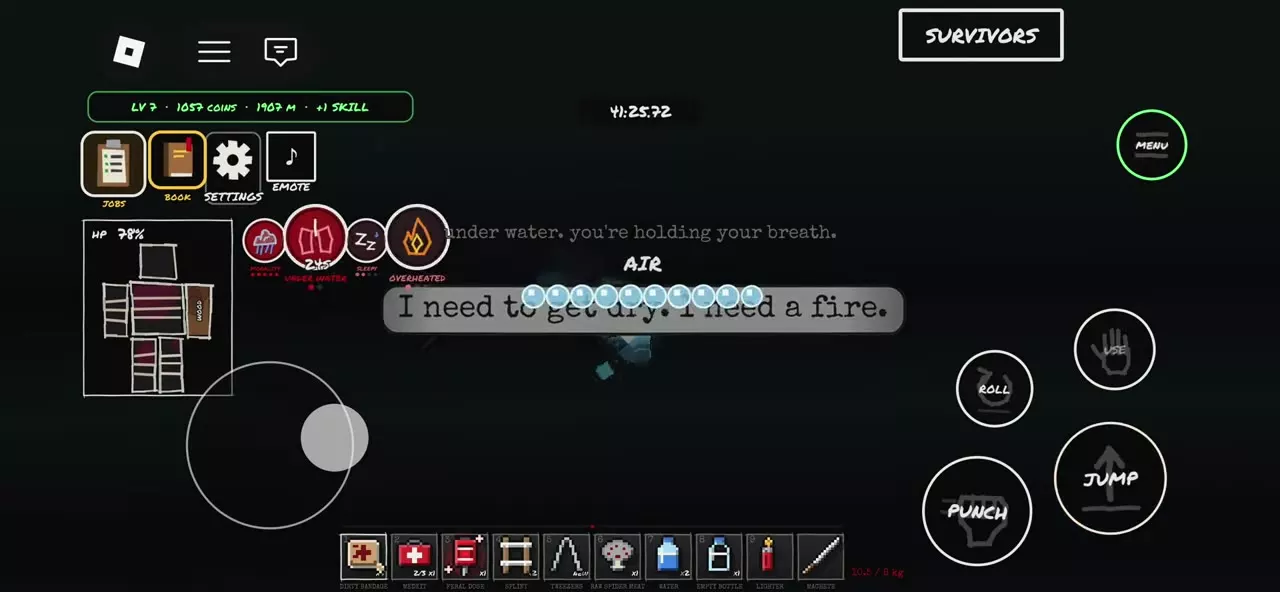
AIR bubbles displayed while a character holds their breath underwater

How to Cross the Flooded Caves in Cave Casualties

Watch the AIR bubbles while submerged and move between breathing spaces toward an upward exit. Identify the next air pocket or reachable platform before entering a long underwater stretch.

Push toward a reachable ledge to catch it, then keep holding CLIMB on mobile or Space on PC until you pull up. Releasing the mobile climb hold drops you.

If TAP FAST TO TEAR FREE appears, tap rapidly until the escape bar fills, then continue toward air. Breaking free releases the grab without refilling your breath.

Biomes & Layers Discovery rewardApproximate occurrencesCaves per occurrence sample
The Frost 600 XP1 occurrences10 caves
The Magma Depths 400 XP1 occurrences8 caves
The Toxic Depths 400 XP——
The Geysers 300 XP1 occurrences7 caves
The Dunes 300 XP1 occurrences8 caves
A revealed Mimic in an upper passage with a red identity warning.

Cave Casualties Creatures and Encounter Responses

Match your escape to the creature’s tracking behavior:

  • Cave Spider: approaching a webbed nest wakes it. If pursued, move behind rock to break its line of sight; throwing an item can stun it before an attack.
  • Stalker: keep a light on to drive it back. It follows through narrow gaps, including passages that force you to crawl.
  • Hushmaw: crouch or crawl to reduce noise. It is blind and tracks sound; sustained quiet makes it lose your trail.
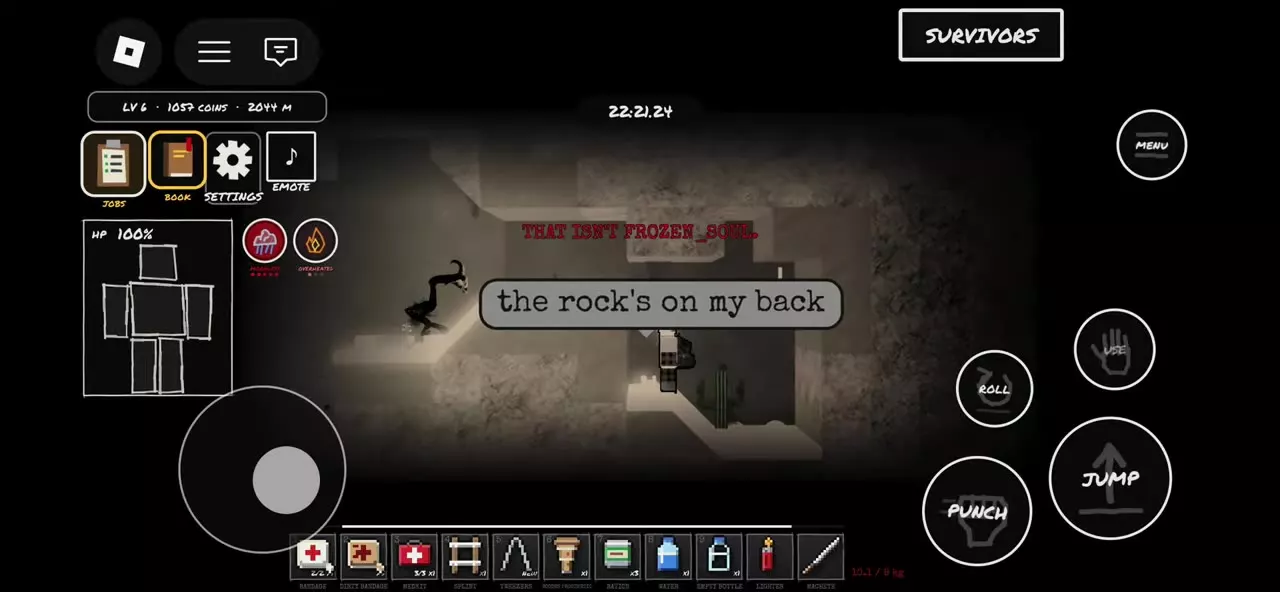
  • Mimic: a revealed encounter’s red THAT ISN’T warning names the friend being impersonated. Face the revealed creature and use Machete swings if you fight.
Creatures Kill XP exampleDiscovery XP
The Hushmaw 650 XP500 XP
The Stalker 350 XP900 XP
Cave Spider 200 XP300 XP
Mimic 40 XP—
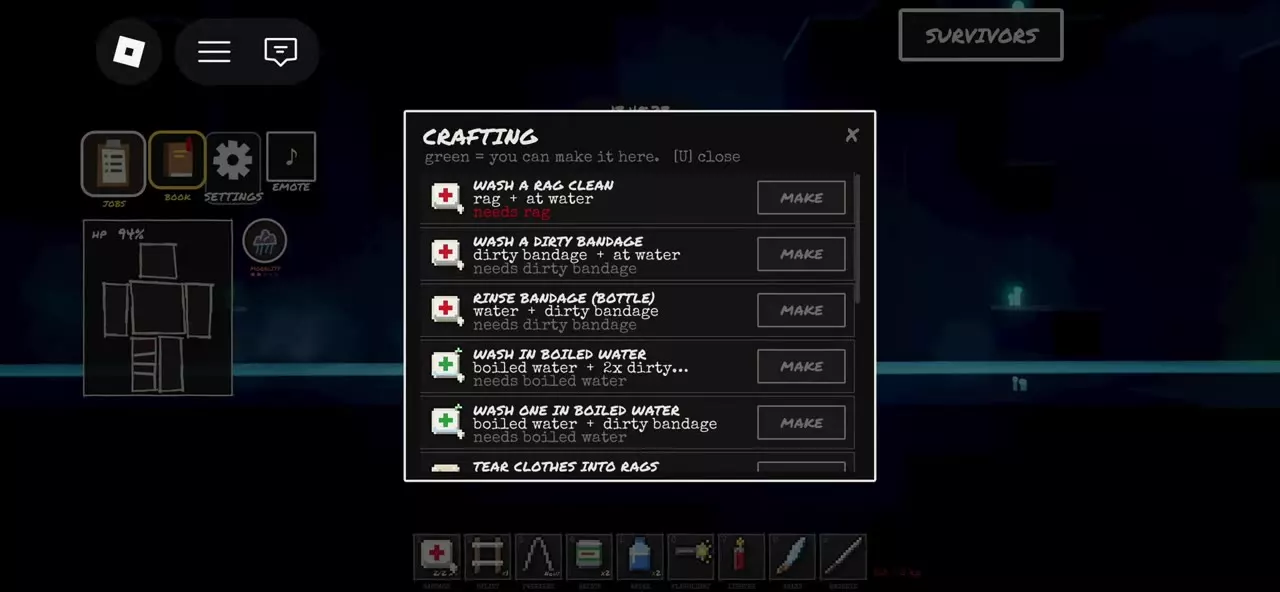
Bandage washing recipes with bottled Water and one-bandage or two-bandage Boiled Water options.

Cave Casualties Crafting Recipes and Cleaning

Choose a cleaning recipe around your location and supplies:

  • At water: WASH A DIRTY BANDAGE requires a Dirty Bandage and a waterside position, saving your carried drinking water.
  • Away from water: RINSE BANDAGE (BOTTLE) uses a Dirty Bandage and one bottle of Water.
  • For sterilizing: use Boiled Water with one Dirty Bandage for WASH ONE IN BOILED WATER, or two Dirty Bandages for WASH IN BOILED WATER. Ordinary washing removes blood; Boiled Water also sterilizes.

Open MENU → CRAFT, select MAKE when the recipe is green and READY, and wait for completion. For an improvised dressing, use spare Leather Clothes + Shard with TEAR CLOTHES INTO RAGS; the Shard is kept. Preserve clothing you still need for warmth.

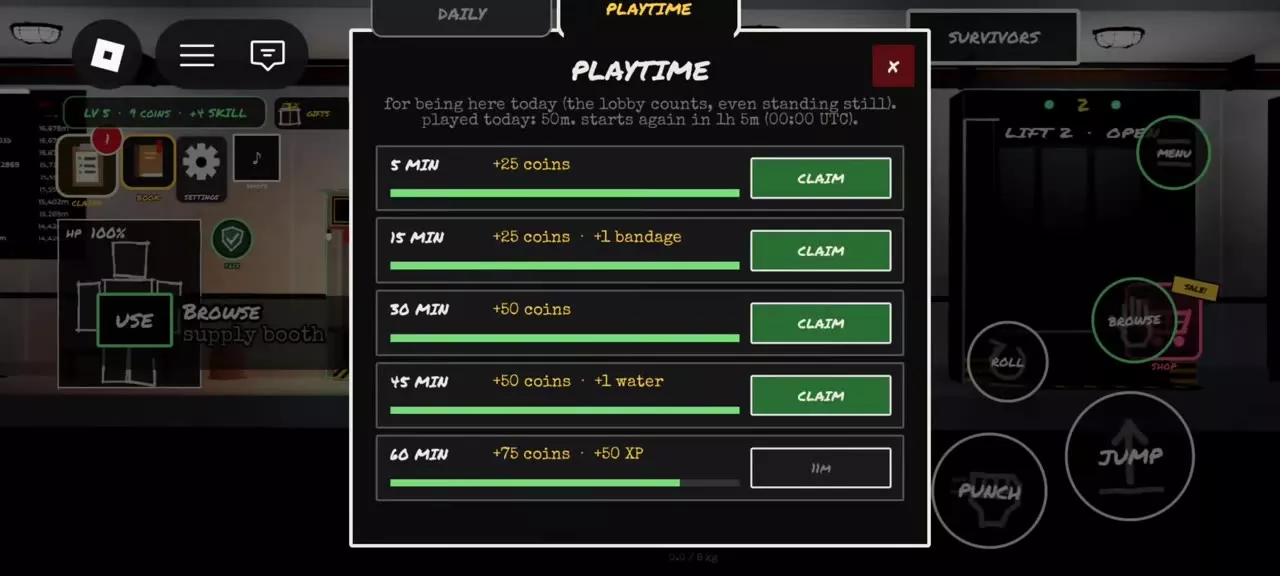
Playtime panel with five time milestones and CLAIM buttons for completed rewards.

Cave Casualties Daily, Playtime and Group Rewards

Daily Bonus rewards a login streak. Collect the available day’s reward and return each day; missing a day restarts the streak. TAKEN marks a collected reward, and the next locked day shows an opening countdown.

Playtime rewards accumulated online time, including standing still in the lobby. Open Gifts → Playtime and select CLAIM on completed milestones. The 15-minute milestone includes one Bandage, and the 45-minute milestone includes one Water. Collect completed rewards before daily progress resets at 00:00 UTC.

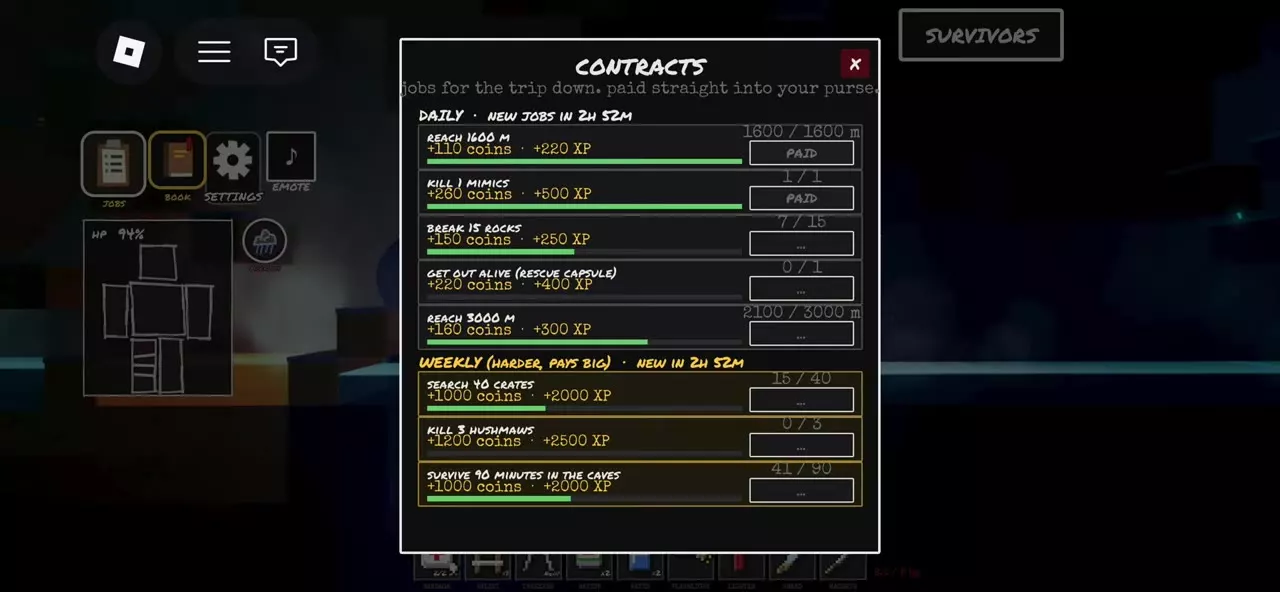
Contracts panel showing Daily and Weekly objectives, rewards and progress counters.

Cave Casualties Contracts and Reward Claims

  1. Before departure, open JOBS. Read each Contract’s objective, progress counter and Coins and XP reward. Choose goals that overlap with your planned route.
  2. Complete the listed task. The Daily Get Out Alive Contract requires one successful Rescue Capsule extraction and lists 220 Coins and 400 XP.
  3. Return to JOBS and select CLAIM. Completing the objective makes the reward available; PAID means you have collected it.
Game Passes Price
PERM ROPE 99 Robux
STARTER PACK 99 Robux
Perm PICKAXE 149 Robux
12-PLAYER LIFTS 149 Robux
PRIVATE SERVER+ 299 Robux