
Cave Casualties Starting Loadouts for Different Trips
Your departure loadout determines which problems you can handle immediately. Start with medical supplies, rope traversal and a weapon, then trade one of those capabilities for the needs of your next trip.
For general exploration, bring Medkit + Lasso + Machete. Replace the Machete with a Pickaxe for digging or a Flashlight for lighting. Cold, combat, food, infection-control and prosthetic loadouts use more specialized combinations. You can select up to three items from your stash before descending.
Choose the Problem Your Three Items Will Solve
Choose Medkit + Lasso + Machete for a general exploration start. Each item covers a different immediate need:
- Medkit: dispenses Clean Bandages or Splints for injury care.
- Lasso: anchors to rock for rope movement or connects you to another player.
- Machete: provides combat and cutting utility, with twice a Shard's damage and longer reach.
This is a balanced beginner loadout because it covers treatment supplies, traversal and fighting. A specialized item takes the place of one of those capabilities: adding a Pickaxe or Flashlight to the Medkit-and-Lasso core means leaving the starting Machete behind.
Buy and Pack the Selected Supplies
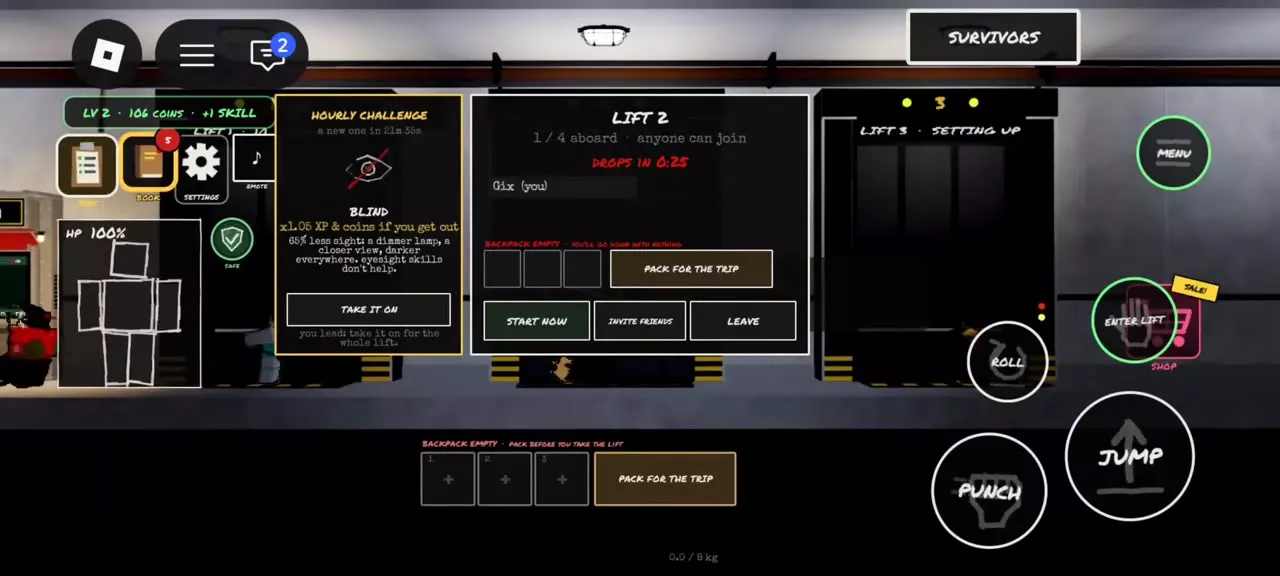
Purchased supplies enter your stash. Own the three items you want to bring, then pack them before descending:
- Open PACK FOR THE TRIP in the lobby, New Expedition settings or the lift waiting screen.
- Select up to three items from your stash.
- Use Empty Backpack to clear a selection, or choose Done when ready.
If your stash is empty, use Buy Supplies or Go to Shop to reach the supply shop. Items you leave unselected stay above in your stash. The three-item limit applies to departure packing; it is not your underground inventory capacity.
Supply Booth budgets
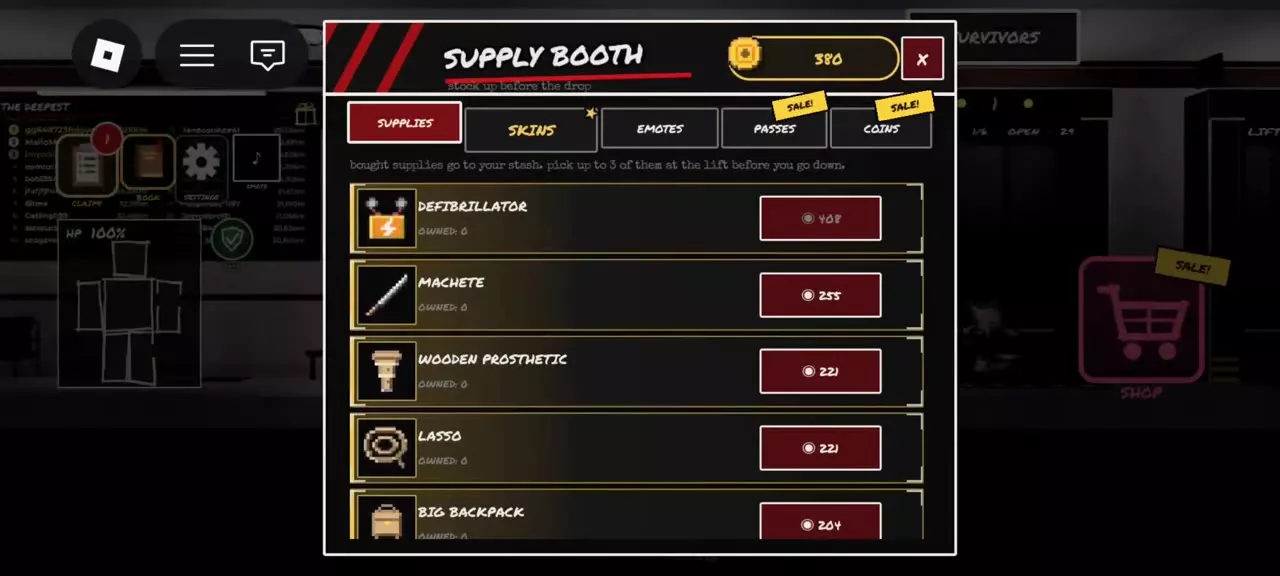
These totals cover buying one of each selected item at the lobby Supply Booth.
| Loadout | Medkit | Lasso | Third item | Total |
|---|---|---|---|---|
| General exploration | 102 Coins | 221 Coins | Machete: 255 Coins | 578 Coins |
| Digging | 102 Coins | 221 Coins | Pickaxe: 128 Coins | 451 Coins |
| Lighting | 102 Coins | 221 Coins | Flashlight: 128 Coins | 451 Coins |
Subtract the price of any item you already own to find the additional Coins you need.
Exploration, Digging and Lighting Loadouts
Keep the Medkit and Lasso when treatment supplies and rope movement are your priorities. Choose the third item for the route ahead.
| Goal | Medical item | Rope item | Third item |
|---|---|---|---|
| General exploration | Medkit | Lasso | Machete |
| Digging | Medkit | Lasso | Pickaxe |
| Lighting | Medkit | Lasso | Flashlight |
General exploration
Choose the Machete when you want a dedicated weapon immediately. Its damage and reach advantage over the Shard makes it the stronger combat choice between those two weapons, and it also provides limb-cutting utility. This combination leaves dedicated digging and lighting equipment out of your departure selection.
Digging routes
Choose the Pickaxe when opening terrain matters more than starting with a Machete. Punching rock damages your fists; the Pickaxe lets you work the terrain with a tool instead. It also damages Cave Spiders.
Near rock, use CHIP A SHARD to make a Shard while keeping the Pickaxe. That gives you a stabbing and cutting tool later, but using the glass weapon can cut your palm. It does not provide the Machete's damage or reach.
Light and rope traversal
Choose the Flashlight for a switchable white beam. Press LMB to toggle it, or use MENU → YOU → Switch it on and hold it in your teeth. This loadout keeps rope traversal and medical supplies while giving up the starting weapon.
A Glowstick costs 17 Coins, compared with 128 Coins for a Flashlight at the Supply Booth. Choose a Glowstick instead when you want inexpensive light that you can throw toward a position. It emits green light and can be retrieved with PICK UP when within reach. Choose the Flashlight when you want a controllable beam and the teeth-held option.
Cold and Combat Loadouts
| Goal | Medical item | Clothing | Third item |
|---|---|---|---|
| Cold conditions | Medkit | Leather Clothes | Lighter |
| Hit protection and combat | Medkit | Iron Clothes | Machete |
Cold conditions
Pack Medkit + Leather Clothes + Lighter when warmth takes priority. Leather Clothes make you warmer and slightly tougher while worn. Hold the clothing and press LMB to put a layer on, then let the action finish.
The Lighter produces a small flame while you hold LMB. Use it on yourself with RMB, or open MENU → YOU, for its warming action. Its personal menu also offers slow ration heating and water boiling: heating requires a Ration, and boiling requires Water. Those actions need the corresponding supplies in your inventory; this three-item cold loadout does not include them.
This choice leaves the Lasso and Machete out of your departure pack. The Lighter supplies a small flame rather than the Flashlight's white beam.
Combat protection
Pack Medkit + Machete + Iron Clothes when protection from hits is the priority. Wear the Iron Clothes to greatly reduce hit damage, and use the Machete for its damage and reach advantage over a Shard.
Iron Clothes are heavy, so this protection adds burden. The combination also uses all three departure selections without a Lasso or dedicated light source. Choose it when the immediate need for hit protection outweighs those traversal and lighting options.
Food, Infection and Prosthetic Loadouts
| Goal | First item | Second item | Third item |
|---|---|---|---|
| Food and water reserves | Medkit | Water | Ration |
| Infection control | Medkit | Antiseptic | Antibiotics |
| Replacement limb | Medkit | Lasso | Wooden Prosthetic |
Food and water reserves
Pack Medkit + Water + Ration to begin with treatment supplies, a drink and food. Water relieves thirst and can rinse dirty bandages; rinsing consumes the bottled water. Ration relieves hunger.
Match prepared replacements to the need you want that selection to cover:
- Replace Water with Boiled Water for clean drinking water and bandage washing.
- Replace Ration with Hot Ration for food and warmth.
- Replace Ration with Cooked Spider Meat for 20 HP of gradual recovery after eating.
This loadout dedicates two selections to consumable reserves, leaving out the starting Lasso and weapon.
Infection control
Pack Medkit + Antiseptic + Antibiotics when infection supplies are your main concern. The Medkit supplies clean dressings. Antiseptic works with a clean dressing to suppress infection, while Antibiotics slow infection progression.
The medicines serve different roles, and neither restores tissue that has already rotted. This combination trades away starting rope, weapon and lighting equipment for treatment supplies.
Replacement limb
Pack Medkit + Lasso + Wooden Prosthetic when having a replacement limb ready is the priority. Keep dressings available for stump bleeding, then select the missing arm or leg in BODY and choose PROSTHETIC to fit the replacement.
A newly fitted Wooden Prosthetic has 65 durability and breaks at 0. Fit another replacement when it breaks; a spare serves that replacement need. This loadout preserves the Lasso but uses the Machete's usual selection for the prosthetic.
Arrange Supplies After Departure
Open MENU → BAG and drag frequently needed supplies toward the front of WHAT YOU CARRY. Number keys 1–9 follow that order. Put your Medkit and the tool you expect to need next within quick reach; see inventory controls for the full item-management controls.
Open a Medkit only when you are ready to choose a supply. Taking a Clean Bandage or Splint consumes a Medkit use. Cancelling the subsequent wrapping action does not return that use, even if you stop before wrapping begins.
Equipment Details and Prices
- Medical supplies and prosthetics: dressings, medicines, Medkits and replacement limbs.
- Tools and light sources: digging equipment, rope tools and lighting options.
- Clothing and protection: warmth, hit protection and clothing use.
- Supply price list: the complete Coins table for lobby supplies and underground offers.