Cave Casualties Beginner Guide
Your goal in Cave Casualties is to descend as far as possible while surviving injuries, infection, exhaustion and mental strain. For your first expedition, prepare supplies, learn to move between platforms, and leave through a Rescue Capsule with your carried loot.
Complete Orientation, then pack a Medkit, Lasso and Machete from your stash. Create or join a lift, open the Survey Capsule door, and descend while searching for supplies. Treat bleeding immediately: inspect the injured part, remove embedded fragments carefully, wrap clockwise and tie off the dressing. Find a Rescue Capsule using the map’s Extraction marker, green light and EXTRACT sign, then complete EXTRACT SAFELY to leave with your loot and earn XP and Coins.
Pack Your Starting Supplies
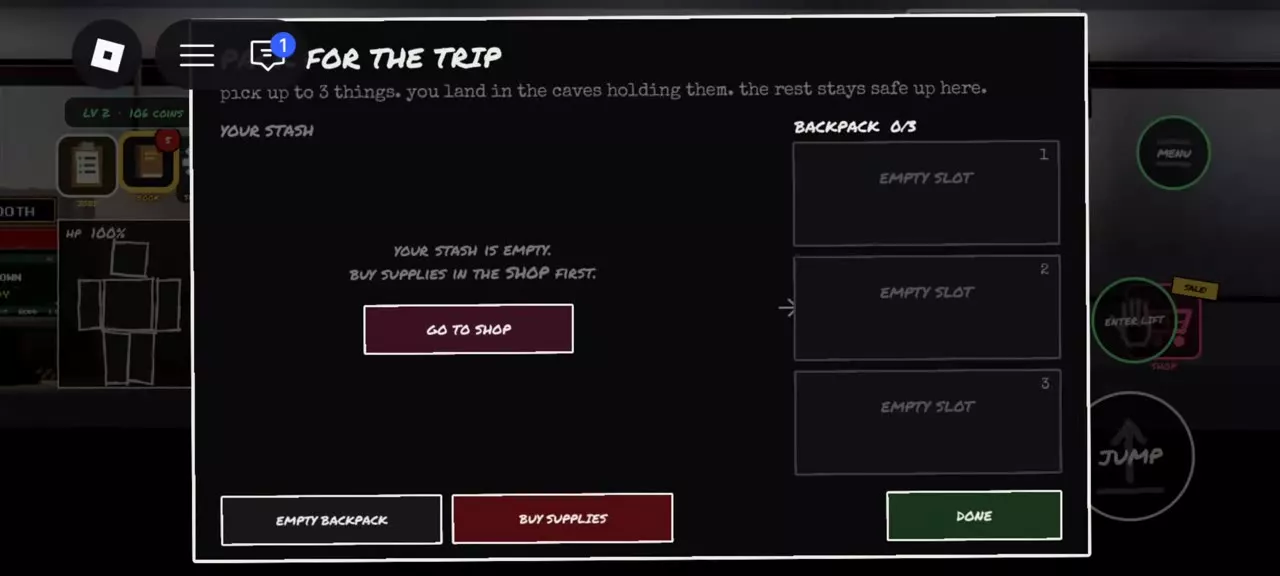
Purchased supplies enter your stash. Buying an item does not automatically pack it for departure.
- Buy supplies at the Supply Booth in The Staging Hall.
- Open PACK FOR THE TRIP from the lobby, New Expedition setup or lift waiting screen.
- Select up to three items from your stash, then choose Done. Empty Backpack clears your selection.
A practical first-trip setup covers treatment, rope movement and defense:
| Item | Main use |
|---|---|
| Medkit | Clean Bandage or Splint |
| Lasso | Rope movement and connections |
| Machete | Melee defense |
The Medkit lets you choose a Clean Bandage or Splint. The Lasso hooks rocks or connects players, giving you a rope option around difficult terrain. The Machete deals twice the Shard’s damage and has longer reach.
For a digging trip, replace the Machete with a Pickaxe. It breaks terrain without punching rock and damaging your fists; sand in The Dunes breaks in one Pickaxe hit. This swap gives up the Machete’s combat advantage while keeping treatment and rope access.
The three-item limit applies to departure packing, not your total inventory capacity underground. Unselected supplies remain in your stash above. An empty backpack still allows departure, but leaves you dependent on supplies found during the trip.
Complete Orientation
Complete the movement and medical exercises before your first trip. Reaching greater depths depends on controlling your descent and keeping injuries from becoming fatal.
- MOVE: Use A and D to walk, Shift to run and Space to jump. The walking dodge uses C.
- CLIMB: Jump toward a ledge while holding the direction toward it. Once hanging, hold Space to pull up; S releases the edge. On touch controls, hold CLIMB to pull up and use LET GO to drop.
- PUSH: Push the box against the high wall, climb onto it, then jump toward the upper ledge. In the right-facing training route, hold D to catch it.
- WALL JUMP: Enter the gap between the two walls and hold Space to ascend. Hold D toward the ledge at the top of the training route.
- Landing roll: Press Q just before touching the ground to reduce fall damage. On touch controls, use ROLL. Mistiming the landing leaves you exposed to bone injuries and loss of walking ability.
- Low passage: Follow the gap’s displayed crouch or roll prompt, or use MENU → LIE DOWN. Keep crawling while the ceiling prevents standing; your character stands when there is enough clearance.
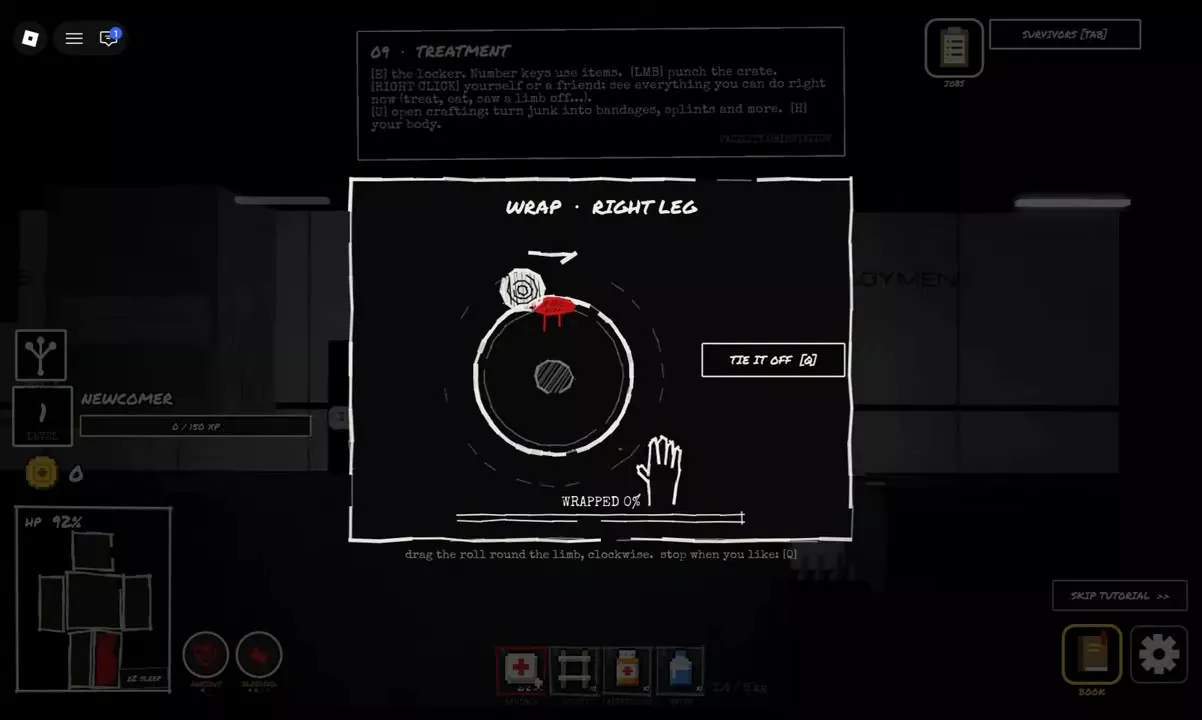
- MEDICAL: Step onto the red pad, inspect the status icons beside HP, and open BODY with H. Collect supplies from the medical cabinet with E, select RIGHT LEG, choose BANDAGE, drag the roll clockwise and finish with TIE IT OFF.
SKIP TUTORIAL skips training. To practice again, open SETTINGS in the lobby and select REPLAY TUTORIAL; replay is restricted to the lobby.
Start a Lift and Leave the Survey Capsule
The Staging Hall gives you a temporarily safe place to prepare before descending.
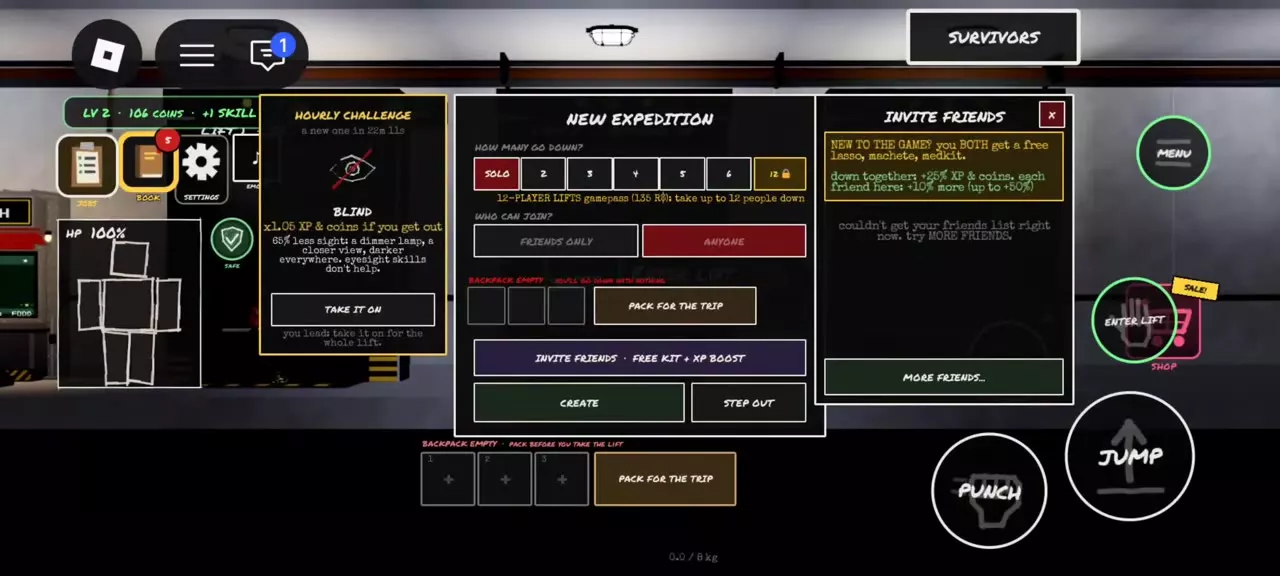
- Approach an open lift and use ENTER LIFT to open New Expedition.
- Choose SOLO or a capacity of 2, 3, 4, 5 or 6 players. The 12-player option requires 12-PLAYER LIFTS.
- Choose Friends Only or Anyone for joining permissions. Use Invite Friends if you want companions, then select Create. Step Out leaves the setup.
- Check the aboard count and DROPS IN countdown. The lift can depart below its selected capacity; it does not need to fill every slot. Wait for the countdown or use START NOW. PACK FOR THE TRIP remains available while waiting, and LEAVE exits the lift.
- After arriving underground, approach the Survey Capsule door and use E on PC or the on-screen USE interaction to open it. Leave the capsule and follow the cave passages downward.
To join someone else’s expedition, use that lift’s panel, subject to its joining permissions.
Check the map before moving away from the capsule. It shows only areas you have already explored, so unexplored space is not a complete route map.
Descend and Gather Supplies
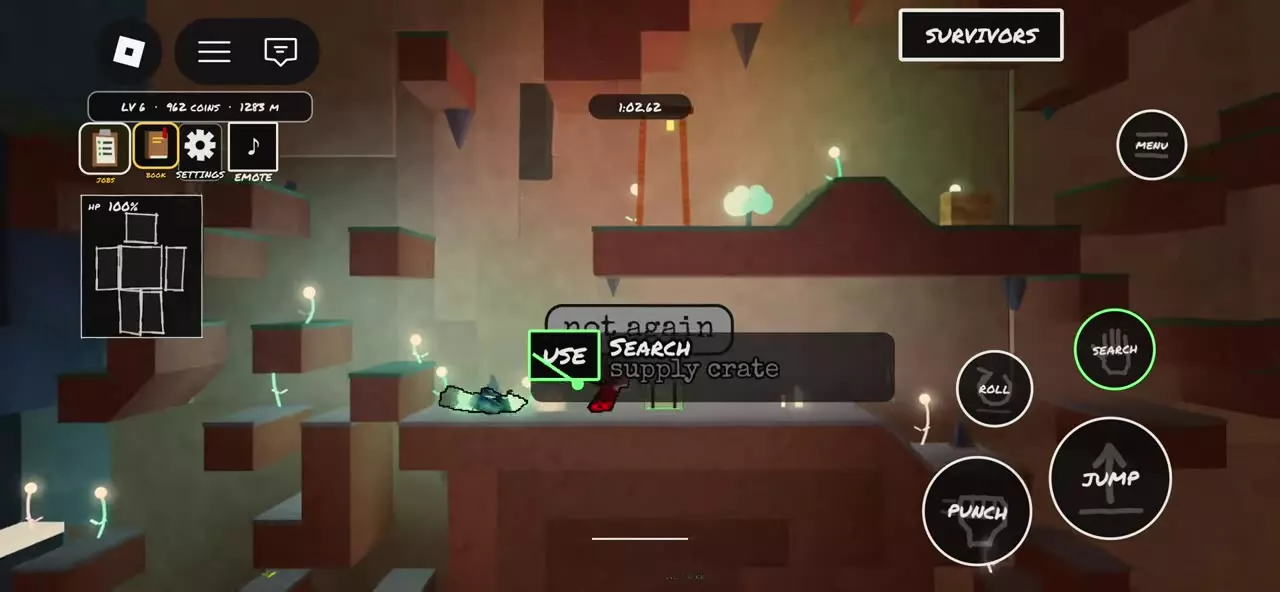
Choose your next landing before leaving a platform. Jump toward reachable ledges and keep pushing toward them to catch the edge, then hold Space or CLIMB to pull up. Roll just before landing when dropping to lower ground; a roll reduces fall damage rather than making every drop safe.
Search along the route to replace supplies you use:
- Supply Crates, Medical Crates and lockers: Approach until SEARCH appears. Press E where prompted on PC, or use SEARCH on touch controls, and continue until the progress finishes. Acquired supplies appear in the hotbar. An empty result gives no loot; “empty, someone got here first” means the container has already been looted.
- Supply Drops: Approach and use OPEN. Keep the interaction going until its progress completes.
- Old backpacks and player bodies: Use SEARCH and take the supplies you need from the contents.
- Loose items: Use PICK UP to collect them.
Searching a container and smashing a breakable crate are different actions. SEARCH completes an interaction to reveal supplies. To smash a breakable crate, attack until it breaks—using LMB on PC—then use PICK UP on the released loot.
Use a Pickaxe for digging instead of punching rock, which damages your fists. Keep clear of spikes: contact causes injuries and embeds fragments. Avoid dropping blindly into terrain you cannot see, especially when the landing contains spikes or leaves no reachable ledge.
Treat Wounds and Recover Before Moving On
Stop and inspect injuries when a body part turns red or a bleeding warning appears. Getting back up after a fall does not treat the wound.
- Press H to open BODY and select the injured part. Hover over the icons beside HP to read the active conditions.
- If fragments are embedded, open the removal action. Hold a fragment, rotate it and pull it out slowly without pushing it back into the wound. Removing fragments alone does not stop bleeding.
- Use a Bandage, Rag or a Clean Bandage from your Medkit. Choose BANDAGE on the affected part to open WRAP.
- Drag the roll clockwise around the limb. Watch WRAPPED progress and the displayed HP recovery. If SLIPPED appears, continue wrapping.
- Select TIE IT OFF to secure the dressing; use Q when that shortcut is displayed. Let the gradual recovery take effect, then inspect the other body parts.
A secured dressing controls bleeding and provides the displayed gradual recovery. Infection, fractures and other conditions need their own treatment. Replace a FILTHY dressing through TAKE OFF before applying a fresh one. Continued untreated blood loss ends in BLED OUT.
Treat open wounds before sleeping: they prevent sleep healing and leave you losing blood while resting. For exhaustion or Out of Breath, stop running and rest through MENU → SLEEP or BODY → SLEEP. Read the conditions and recovery preview before confirming. Drink Water when thirsty; a bandage does not address thirst or exhaustion.
Leave Through a Rescue Capsule
Use a Rescue Capsule when you choose to end the expedition alive with your carried loot. If wounds or dwindling supplies are making further descent dangerous, prioritize reaching an exit.
- Check the explored map for an Extraction marker and use it to guide your approach.
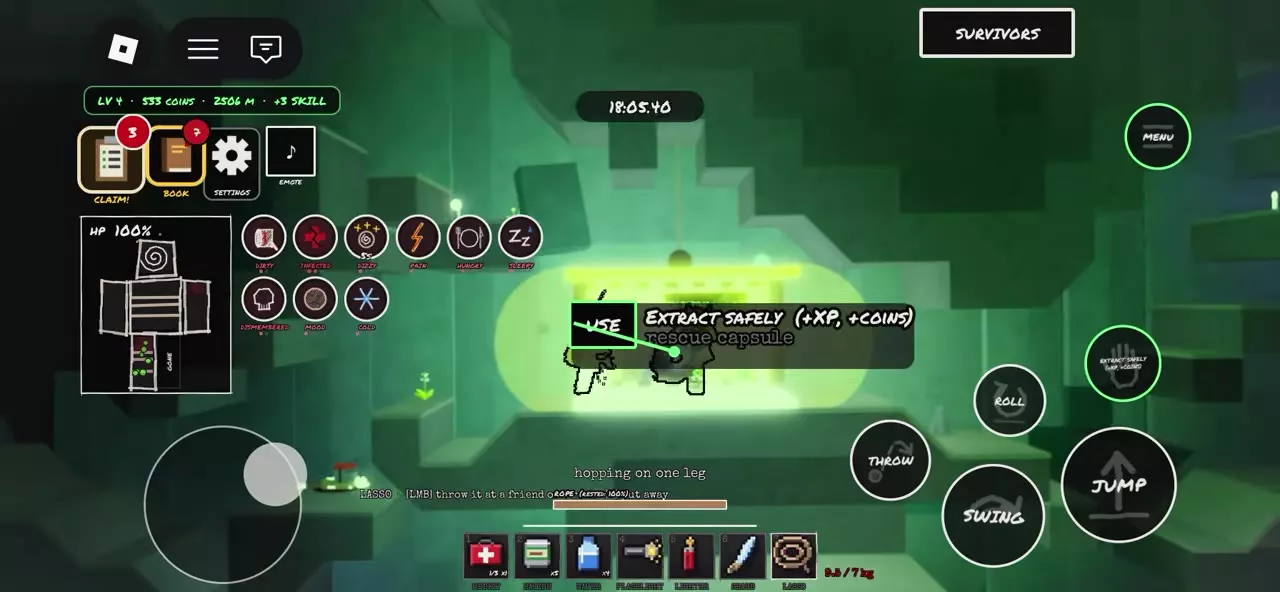
- Look for the capsule’s green light and EXTRACT sign.
- Approach the Rescue Capsule and activate its lever through USE / EXTRACT SAFELY.
- Continue the interaction until the extraction progress finishes.
Safe extraction takes your carried loot out with you and awards XP and Coins. The starting Survey Capsule is your arrival room; look for the Rescue Capsule’s extraction interaction to leave.
Controls, Loadouts and Treatment
- Use Controls and Movement for platform-specific inputs, wall jumps, crawling and menu actions.
- Choose Starting Loadouts when your next trip needs digging, lighting, cold protection or another specialized setup.
- Use Inventory, Stash and Packing for hotbar order, carrying equipment and weight.
- Follow Healing and Injury Treatment for fractures, dislocations, infection and dressing maintenance.
- Use How to Extract Safely for the full task of locating a Rescue Capsule and leaving with your loot.